This article will guide you through creating a Permission*Please note, you may require system administrator privileges to complete this process.*
Viewing the Permission tab
The Permissions tab can be found on the left-hand menu.

Creating a Permission
To add a new Permission follow the steps below:
- Enter into the Permissions tab
- Select 'Add New+' at the top right of the screen


- Fill in the following information
- Permission Question
- Expiry Date
- Y/N - Allow Guardians to upload supporting documents
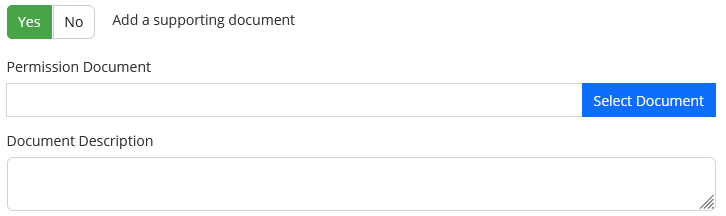
- Y/N - Add a supporting document
Selecting 'Yes' to this allows you to select the document you'd like to add, and provide a brief description
- Y/N - Boarders Only
- Y/N - Do you want to send this permission to the whole school
Selecting 'No' to this allows you to choose the year groups you'd like it sent to

- PLEASE NOTE: Filtering through permissions does NOT filter through to invites when being sent. If you are targeting specific year levels you are required to filter the student list accordingly.
- Once the information has been entered, click 'Submit'
We hope this guide helped with your enquiry.

- Permission Question
- Expiry Date
- Y/N - Allow Guardians to upload supporting documents
- Y/N - Add a supporting document
Selecting 'Yes' to this allows you to select the document you'd like to add, and provide a brief description - Y/N - Boarders Only
- Y/N - Do you want to send this permission to the whole school
Selecting 'No' to this allows you to choose the year groups you'd like it sent to - PLEASE NOTE: Filtering through permissions does NOT filter through to invites when being sent. If you are targeting specific year levels you are required to filter the student list accordingly.
Was this article helpful?
That’s Great!
Thank you for your feedback
Sorry! We couldn't be helpful
Thank you for your feedback
Feedback sent
We appreciate your effort and will try to fix the article