The Consent2Go For Staff app is a digital solution that brings together key information for student care and event management. The app is linked to your school Consent2Go account and ensures that you have current information available on your mobile device when and where you need it.
This article will cover:
- Downloading and logging into the app
- A breakdown of the sections of the app (Event Mode)
- How to review events, mark attendance and access student data
- How to view teams, and access player data
For more information about the 'Nurse Mode' function of the app, go here: https://consent2go.freshdesk.com/a/solutions/articles/61000302708
1. Downloading and Logging Into the App
To use the Consent2Go For Staff app, you can download it from the Apple App Store, or Google Play Store.
Once downloaded, you will be prompted to login. This process is the same as logging into the Consent2Go web page:
- If your school uses Standard login, you will have to enter the same email address and password which you use to log into the Consent2Go web page. If you have never logged into the Consent2Go web page, please contact the Consent2Go administrator at your school to request access to Consent2Go.
- If your school uses Single Sign-On (SSO) login, enter your email address, and then follow the prompts to login via your school SSO account. If you are unable to login via SSO, please contact the Consent2Go administrator at your school to confirm your account.
2. Overview of the Functions of the App (Event Mode)
There are 3 sections of the Consent2Go For Staff app;

Activities, Groups & Settings
Activities:
This is where all your events/excursions are listed. There are two conditions that determine whether you will see the event/excursion in the app:
- You have been added to the ‘Supervisory Team’ of the event
- It is 3 days prior to the event - Events will only appear in the app 3 days prior to the scheduled start date of the event/excursion and will be removed from the app 1 day after the scheduled end date of the event/excursion.
 Through this section of the app, when an event is available, the staff members can view the following:
- Event Details
- Location of the Event
- Arrival and Departure Times
- People/Staff involved in the event
- Activities included in the event
- Student Details
- List of students invited to the event
- Students attending/not attending the event
- Individuals’ data (such as contact details, medical details, and permissions)
How to Mark Attendance:
- Select ‘View Students’
- Towards the bottom right, select ‘Mark Attendance’
- Tick the boxes next to the students present
- Click ‘Finalize’
How to Review Student Information:
- Select ‘View Students’
- Click the student you’d like to view
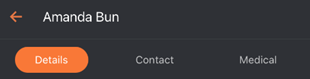
- This will show you their ‘Details’ / ‘Contact’ / ‘Medical’
- The ‘Details’ Section shows a photo of the student, their care details, and their emergency details (Medicare number/DOB)
- The ‘Contact’ Section provides the parent/guardian contact information
- The ‘Medical’ Section lists any medical conditions the student has on record, along with any supporting information or documents regarding their conditions
How to Review Event Details:

- Select the event title under ‘Activities’
- This will show the following:
‘About’ / ‘People’ / ‘Activities’
- The ‘About’ section provides the event address, departure times and arrival times.

- The ‘People’ section lists the staff involved in the event.
- The ‘Activities’ section shows the itinerary of the event, with location and times for specific activities. It also shows the risks involved with each activity, e.g., ‘Disability access is available’.

Groups
This section shows any teams or groups you may be associated with. If you are assigned as a coach or a supervisor you will be able to see a list of your teams/groups. Through this section, by selecting on the team/group, you can view a list of the students involved. Through this list, you can view the student’s information (‘Details’ / ‘Contact’ / ‘Medical’ – as seen above).
Settings
The Settings tab allows you to do the following:
- Change the app mode
Read more about the ‘Nurse Mode’ of the app here:
https://consent2go.freshdesk.com/a/solutions/articles/61000302708 - Report an issue
- View the current app version in ‘About’
- View the Consent2Go privacy policy
- Log out of the app
Was this article helpful?
That’s Great!
Thank you for your feedback
Sorry! We couldn't be helpful
Thank you for your feedback
Feedback sent
We appreciate your effort and will try to fix the article