This article will provide you with an overview of the 'Risk' stage of an event planOverview:
The Risks tile provides you with the necessary information needed to mitigate identified risks included in your event. Through this tile, you can view:
- Participant Risks
- Activity Risks
- Transport Risks
- General Risks
- Location & Accommodation Risks (if an overnight event)
- and add manual risks if you believe there is information that has not been outlined correctly.

Each section requires you to review and acknowledge the risk, provides you with guidelines and mitigation suggestions, and has a note section in case you'd like to add additional information.
It is crucial that this tile is completed accurately and thoroughly to ensure your students safety while participating in your event.
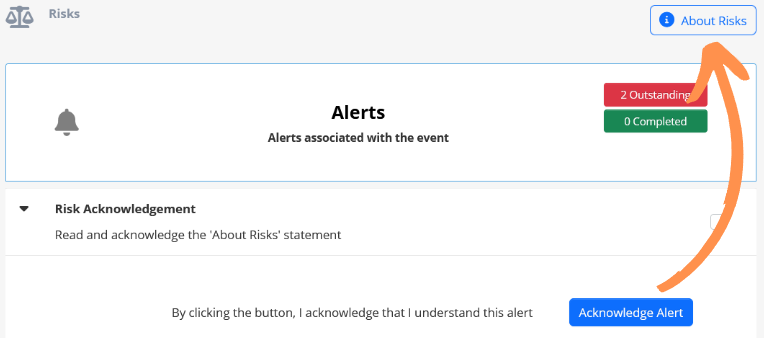
Risk: Alerts
The first step of the Risks tile is the 'Alerts' segment. The information in this section is provided to make you aware of different aspects of your event. For example, if the event has been duplicated you will receive the 'Event Duplicated' risk, which prompts you to check the event planning thoroughly:

Note: The alert 'Read and acknowledge the 'About Risks; statement' is referring to the statement which can be found at the top right of the tile:

Completing the Risks Section:
Follow the steps below to work through the Risk tile:
- Select the 'Risks' tile from the event plan
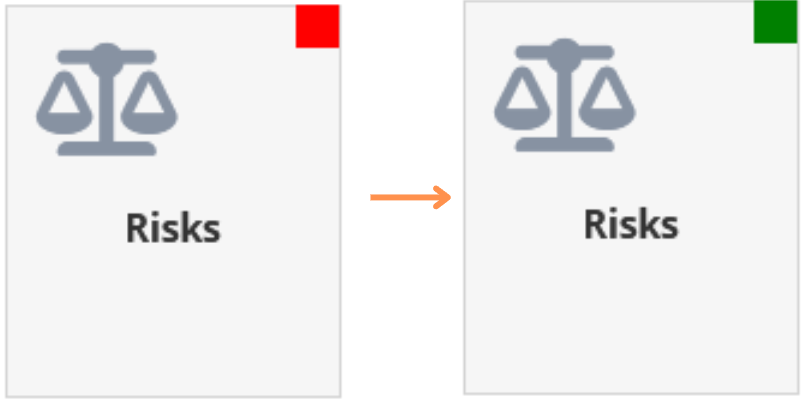
- Identify if there are risks associated, by checking the right side of each bar.
If it shows 'x Outstanding' there are risks that need to be checked:

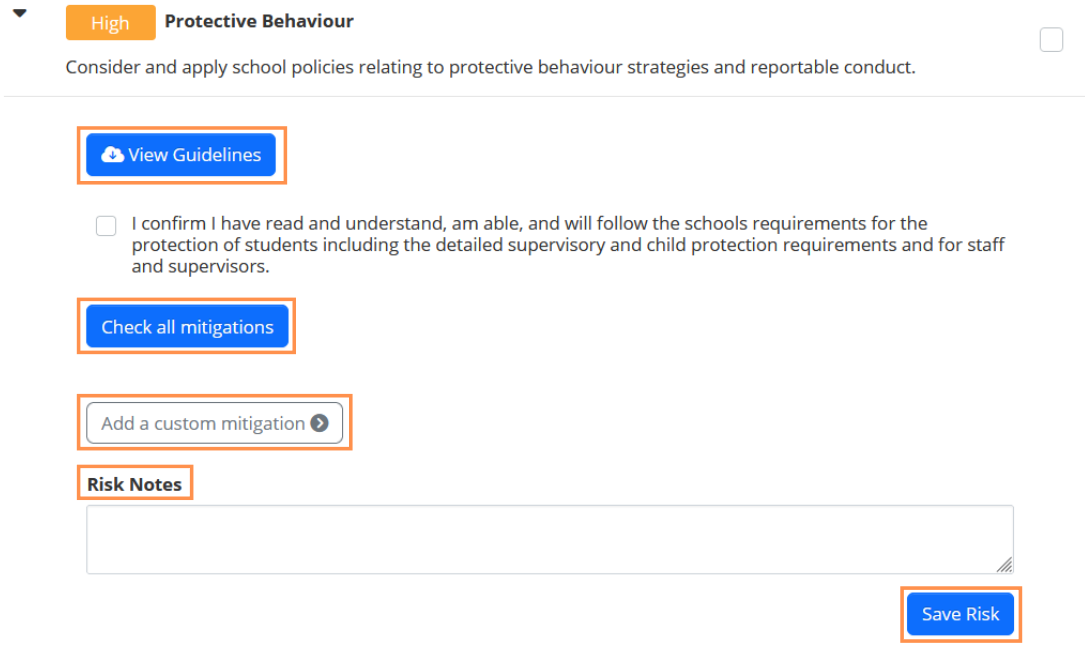
- By selecting the tile, it will drop down with the risks you need to check, along with their severity and status. You can also select 'Add Risk' if you believe there is something missing from this section. Click the arrow to continue to the next step.

- This section will require you to read the statement, and 'Check all mitigations' to confirm you have done so. You can also add custom mitigations, add risk notes and download a copy of the guidelines.
- Work through each section as required, and once they are all completed the Risks tile will change from red to green
We hope this guide helped with your enquiry.

If it shows 'x Outstanding' there are risks that need to be checked:
Was this article helpful?
That’s Great!
Thank you for your feedback
Sorry! We couldn't be helpful
Thank you for your feedback
Feedback sent
We appreciate your effort and will try to fix the article