This article will provide you with the answers to an array of Frequently Asked Questions regarding Event ManagementFAQ's Included:
- What do the symbols mean against a students invitation?
- How do I add students to an event after invites have been sent?
- How do I duplicate an event?
- What's a Multi-Date and how to I make one?
- How do I resend an event invitation?
- How do I move an excursion date?
- How can I change the RSVP date for my event?
What do the symbols mean against a students invitation?
Paperclip: Student requires hardcopy of invite
House: Student is a boarder
Car: Parent providing transport
White Flag: Additional information has been added to student information for this event/excursion ONLY.
Envelope:
Red: Invitation has been triggered but delivery is pending. Will disappear if delivered successfully.
Yellow: A contact email is rejecting or there is an email address not supplied.
Black: Student is banned from events (which means parents don’t receive an email)
Suitcase:
Red: Life-Threatening Medical
Blue: Information Only Medical
Yellow: Urgent Attention Medical
Green: Non-Urgent Attention Medical
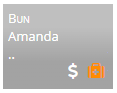
Dollar Symbol
White: Paid
Yellow: Manual Payment
Red: To pay later
How do I add students to an event after invites have been sent?
Navigate to the event, and follow the steps below:
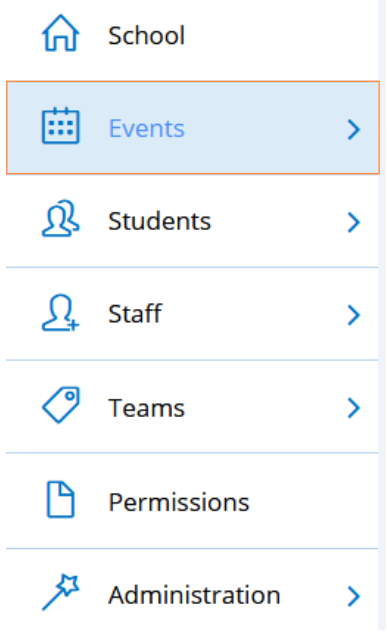
- Select the 'Events' tab in the left-hand menu:

- Click the event to open it, then navigate to the '3. Invitations' tab:

- Determine if the event uses a Team, Personal Group or Student Group, then scroll down to find the appropriate group.
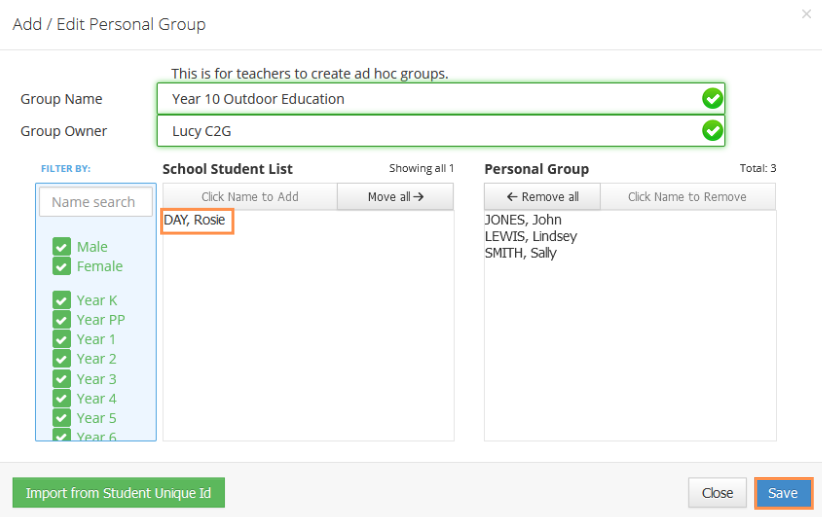
*Please note: If the event uses a set class/year or the whole school, the student will automatically appear in the '5. Attendance' tab* - Once you have found the appropriate group, select the purple pencil icon to edit it

- From the pop-up, find the student you wish to invite and click their name. This will transfer them across to the group
- Then hit save at the bottom right, scroll down and hit save again
- This will take you out of the event, so reenter into it then navigate to the '5. Attendance' tab:

- The new student will appear here, with the option to 'Send Invites':

- Select the option, then click confirm
- The student will then move to 'No Response' and an invitation will be sent to the parent/guardian
How do I duplicate events?
Follow the steps below to view and duplicate a previous event:
- Select the 'Events' tab in the left-hand menu:

- For past events, select the 'Calendar' view and navigate to the date the event was last held, and select it to open.

Otherwise, find the event in the list and click to open it. - The event will open on the '5. Attendance' tab, navigate to the '4. Summary' tab:

- Scroll to the bottom of the page, then select the 'Duplicate Excursion' button:

- A pop-up will display, allowing you to choose the new date, opt to keep the current student selection and confirm to continue:

- Once this has been completed, the event will now appear in the Events List on the new chosen date.
- The event will be set back to the beginning stage, and will require re-approval. However, the information will remain, and will require review.
Things to Note:
- The event will require the proposal and planning to be reapproved.
- The planning phase will need to be thoroughly checked to ensure the information is accurate and up to date.
- A risk alert will appear in the Risk Tile of the planning, to notify you that this event has been duplicated.
- Changes can be made as needed.
- Keeping the current student selection may mean there are new participation risks involved if there has been a change to the student information.
What's a multidate and how do I make one?
Overview:
Multi-Date events are a great way of managing a recurring event or activity that does not require continuous consent from parents/guardians. For example, if the drama class has production rehearsals every Thursday after school - the teacher could create a multi-date event for each Thursday for the rest of term, and the parents would only have to give consent once if needed at all.
Multi-dates can be utlisied for both Incursion or Excursion events, and this guide will provide some basic information in creating a Multi-date event.
Creating the Proposal:
Follow the steps below to create the Proposal for a Recurring event:
- Select the 'Events' tab in the left-hand menu:

- At the top from of the right, select 'New Event +':

- This will display a pop-up menu prompting you to select the event type - from here, click 'Recurring' then select whether it's an Incursion or Excursion:
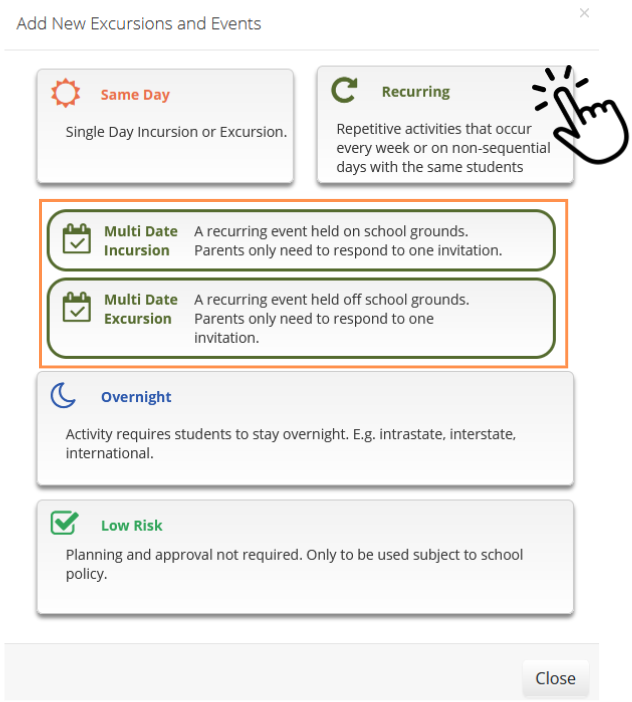
- This will begin the proposal process. Something to note with a Multi-Date proposal is that under the 'Where' section, the option to select 'End Date Unknown' will appear:

By selecting the option, an end date will not be set which will allow you to plan and repeat the event for as long as needed, and add additional dates if needed. If an end date is selected during the proposal, this can not be edited in the planning phase, and events will not be able to be added beyond that date. - Complete the remainder of the Proposal, then select 'Save and Begin Approval'
Planning Activities in a Multi-Date:
The steps below will outline how to add activities to a Multi-Date event:
- Select the 'Events' tab in the left-hand menu:

- Select the 'Planning' button beside the name of the event:
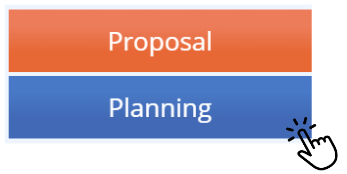
- If your event is already active, you can view the planning by selecting the arrow beside the event, causing the above tabs to drop down:

- From the Planning tab, enter into the 'Activity & Transport' Tile

- Select the 'Add Activity' button, to enter the required information for the activity involved with your Multi-Date event:
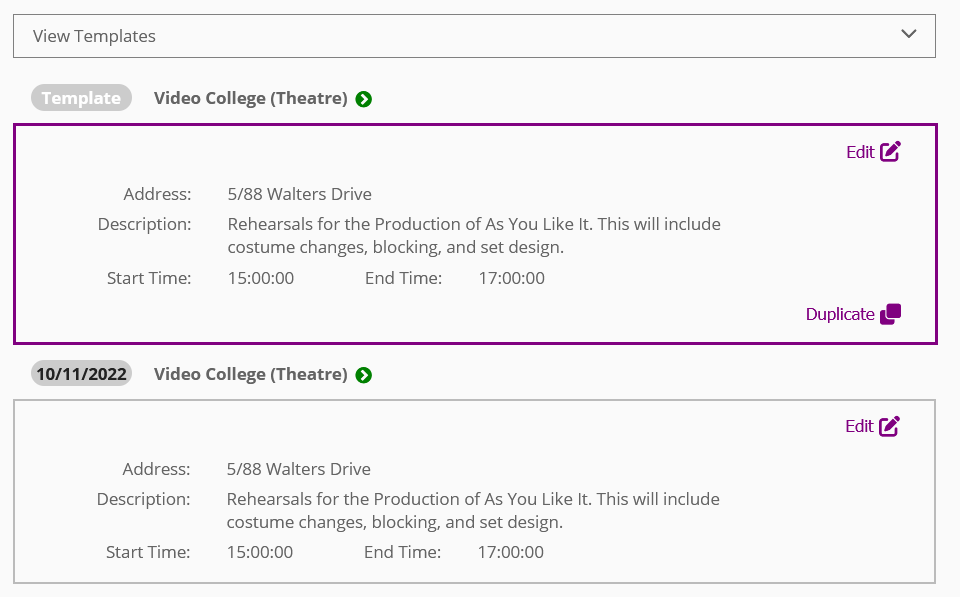
 Note: When an activity has been added for a multi-date event, it will create a template which can be duplicated for different dates as needed. This prevents the need to continuously click 'Add Activity' to add the same activity.
 - To duplicate an event, select 'View Templates'. This will show a drop down of the current activities that have been created.

- From this drop down, select 'Duplicate'.

- This will cause a pop-up to display, which allows you to choose the dates/frequency you'd like to duplicate this activity for:

Daily:
Every day from the start to end date (with the option to ignore weekends)
Weekly:
Every X weeks on specified days
Monthly:
Every X months on specified days
Custom:
Any selected days that are added here
9. Once you have outlined the dates you'd like the activity to repeat on, select 'Duplicate'
This will cause the activity to appear on the list within the tile, which you can edit if needed
If an activity goes across multiple dates, the event will repeat in the Event List.

To remove them from this list, delete the activity within the Activity & Transport tile.
10. Once you have added all the necessary activities to your event, continue the planning process as usual.
How do I resend an event invitation?
Follow the steps below:
1. On the left menu, click 'Events'.
2. Click on the desired event title.
3. You will be taken to '5. Attendance'.

4. Click on student.
5. Student details box will appear. Click 'Resend Invite'. An invite will be sent to parents and student.

How do I move an event date?
To change the date of an event, follow the steps below:
- Select the 'Events' tab from the left-hand menu:

- Find the event you wish to change, and select the 'Proposal' Tab:
 Alternatively, if the invitations have already been sent, select the grey arrow to cause the above boxes to display:
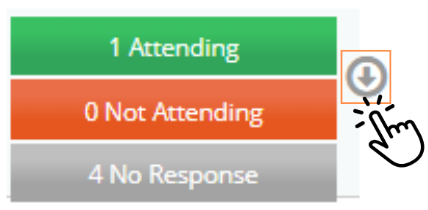
- Scroll to the bottom of the proposal page, and select 'Move Excursion Date'

- Enter the new date, and click 'Confirm'

NOTE: If the invitations have already been sent, the responses for these invites will NOT be changed. To inform parents/guardians of the new date, we recommend sending them a message within the event. For a guide on how to do this, please click here.
How do I change the RSVP date for my event?
Follow the steps below to change the date for an event RSVP:
- Select the 'Events' tab in the left-hand menu:
- Click on the event from the list. This will open the 5. Attendance tab
- From here, select 1. Excursion

- Scroll down to the RSVP date section, and change it to a future date (even one day in the future will allow parents/guardians to respond to invites).

- Then scroll down to the bottom, and click 'Save' at the bottom right

Once completed, the parents/guardians will be able to respond to invites as per usual. If they are still having issues, you are able to send them a new invite link.
Navigate to the event, and follow the steps below:
- Select the 'Events' tab in the left-hand menu:
- Click the event to open it, then navigate to the '3. Invitations' tab:
- Determine if the event uses a Team, Personal Group or Student Group, then scroll down to find the appropriate group.
*Please note: If the event uses a set class/year or the whole school, the student will automatically appear in the '5. Attendance' tab* - Once you have found the appropriate group, select the purple pencil icon to edit it
- From the pop-up, find the student you wish to invite and click their name. This will transfer them across to the group
- Then hit save at the bottom right, scroll down and hit save again
- This will take you out of the event, so reenter into it then navigate to the '5. Attendance' tab:
- The new student will appear here, with the option to 'Send Invites':
- Select the option, then click confirm
- The student will then move to 'No Response' and an invitation will be sent to the parent/guardian
How do I duplicate events?
Follow the steps below to view and duplicate a previous event:
- Select the 'Events' tab in the left-hand menu:
- For past events, select the 'Calendar' view and navigate to the date the event was last held, and select it to open.
Otherwise, find the event in the list and click to open it. - The event will open on the '5. Attendance' tab, navigate to the '4. Summary' tab:
- Scroll to the bottom of the page, then select the 'Duplicate Excursion' button:
- A pop-up will display, allowing you to choose the new date, opt to keep the current student selection and confirm to continue:
- Once this has been completed, the event will now appear in the Events List on the new chosen date.
- The event will be set back to the beginning stage, and will require re-approval. However, the information will remain, and will require review.
Things to Note:
- The event will require the proposal and planning to be reapproved.
- The planning phase will need to be thoroughly checked to ensure the information is accurate and up to date.
- A risk alert will appear in the Risk Tile of the planning, to notify you that this event has been duplicated.
- Changes can be made as needed.
- Keeping the current student selection may mean there are new participation risks involved if there has been a change to the student information.
What's a multidate and how do I make one?
Overview:
Multi-Date events are a great way of managing a recurring event or activity that does not require continuous consent from parents/guardians. For example, if the drama class has production rehearsals every Thursday after school - the teacher could create a multi-date event for each Thursday for the rest of term, and the parents would only have to give consent once if needed at all.
Multi-dates can be utlisied for both Incursion or Excursion events, and this guide will provide some basic information in creating a Multi-date event.
Creating the Proposal:
Follow the steps below to create the Proposal for a Recurring event:
- Select the 'Events' tab in the left-hand menu:
- At the top from of the right, select 'New Event +':
- This will display a pop-up menu prompting you to select the event type - from here, click 'Recurring' then select whether it's an Incursion or Excursion:
- This will begin the proposal process. Something to note with a Multi-Date proposal is that under the 'Where' section, the option to select 'End Date Unknown' will appear:
By selecting the option, an end date will not be set which will allow you to plan and repeat the event for as long as needed, and add additional dates if needed. If an end date is selected during the proposal, this can not be edited in the planning phase, and events will not be able to be added beyond that date. - Complete the remainder of the Proposal, then select 'Save and Begin Approval'
Planning Activities in a Multi-Date:
The steps below will outline how to add activities to a Multi-Date event:
- Select the 'Events' tab in the left-hand menu:
- Select the 'Planning' button beside the name of the event:
- If your event is already active, you can view the planning by selecting the arrow beside the event, causing the above tabs to drop down:
- From the Planning tab, enter into the 'Activity & Transport' Tile
- Select the 'Add Activity' button, to enter the required information for the activity involved with your Multi-Date event:
Note: When an activity has been added for a multi-date event, it will create a template which can be duplicated for different dates as needed. This prevents the need to continuously click 'Add Activity' to add the same activity. - To duplicate an event, select 'View Templates'. This will show a drop down of the current activities that have been created.
- From this drop down, select 'Duplicate'.
- This will cause a pop-up to display, which allows you to choose the dates/frequency you'd like to duplicate this activity for:
Daily:
Every day from the start to end date (with the option to ignore weekends)
Weekly:
Every X weeks on specified days
Monthly:
Every X months on specified days
Custom:
Any selected days that are added here
9. Once you have outlined the dates you'd like the activity to repeat on, select 'Duplicate'
This will cause the activity to appear on the list within the tile, which you can edit if needed
If an activity goes across multiple dates, the event will repeat in the Event List.
To remove them from this list, delete the activity within the Activity & Transport tile.
10. Once you have added all the necessary activities to your event, continue the planning process as usual.
How do I resend an event invitation?
Follow the steps below:
1. On the left menu, click 'Events'.
2. Click on the desired event title.
3. You will be taken to '5. Attendance'.
4. Click on student.
5. Student details box will appear. Click 'Resend Invite'. An invite will be sent to parents and student.
How do I move an event date?
To change the date of an event, follow the steps below:
- Select the 'Events' tab from the left-hand menu:
- Find the event you wish to change, and select the 'Proposal' Tab:
Alternatively, if the invitations have already been sent, select the grey arrow to cause the above boxes to display: - Scroll to the bottom of the proposal page, and select 'Move Excursion Date'
- Enter the new date, and click 'Confirm'
NOTE: If the invitations have already been sent, the responses for these invites will NOT be changed. To inform parents/guardians of the new date, we recommend sending them a message within the event. For a guide on how to do this, please click here.
How do I change the RSVP date for my event?
Follow the steps below to change the date for an event RSVP:
- Select the 'Events' tab in the left-hand menu:
- Click on the event from the list. This will open the 5. Attendance tab
- From here, select 1. Excursion
- Scroll down to the RSVP date section, and change it to a future date (even one day in the future will allow parents/guardians to respond to invites).
- Then scroll down to the bottom, and click 'Save' at the bottom right
Once completed, the parents/guardians will be able to respond to invites as per usual. If they are still having issues, you are able to send them a new invite link.
Otherwise, find the event in the list and click to open it.
Multi-Date events are a great way of managing a recurring event or activity that does not require continuous consent from parents/guardians. For example, if the drama class has production rehearsals every Thursday after school - the teacher could create a multi-date event for each Thursday for the rest of term, and the parents would only have to give consent once if needed at all.
Multi-dates can be utlisied for both Incursion or Excursion events, and this guide will provide some basic information in creating a Multi-date event.
Creating the Proposal:
Follow the steps below to create the Proposal for a Recurring event:
- Select the 'Events' tab in the left-hand menu:
- At the top from of the right, select 'New Event +':
- This will display a pop-up menu prompting you to select the event type - from here, click 'Recurring' then select whether it's an Incursion or Excursion:
- This will begin the proposal process. Something to note with a Multi-Date proposal is that under the 'Where' section, the option to select 'End Date Unknown' will appear:
By selecting the option, an end date will not be set which will allow you to plan and repeat the event for as long as needed, and add additional dates if needed. If an end date is selected during the proposal, this can not be edited in the planning phase, and events will not be able to be added beyond that date. - Complete the remainder of the Proposal, then select 'Save and Begin Approval'
Planning Activities in a Multi-Date:
The steps below will outline how to add activities to a Multi-Date event:
- Select the 'Events' tab in the left-hand menu:
- Select the 'Planning' button beside the name of the event:
- If your event is already active, you can view the planning by selecting the arrow beside the event, causing the above tabs to drop down:
- From the Planning tab, enter into the 'Activity & Transport' Tile
- Select the 'Add Activity' button, to enter the required information for the activity involved with your Multi-Date event:Note: When an activity has been added for a multi-date event, it will create a template which can be duplicated for different dates as needed. This prevents the need to continuously click 'Add Activity' to add the same activity.
- To duplicate an event, select 'View Templates'. This will show a drop down of the current activities that have been created.
- From this drop down, select 'Duplicate'.
- This will cause a pop-up to display, which allows you to choose the dates/frequency you'd like to duplicate this activity for:
Daily:
Every day from the start to end date (with the option to ignore weekends)
Weekly:
Every X weeks on specified days
Monthly:
Every X months on specified days
Custom:
Any selected days that are added here
9. Once you have outlined the dates you'd like the activity to repeat on, select 'Duplicate'
This will cause the activity to appear on the list within the tile, which you can edit if needed
If an activity goes across multiple dates, the event will repeat in the Event List.
To remove them from this list, delete the activity within the Activity & Transport tile.
10. Once you have added all the necessary activities to your event, continue the planning process as usual.
How do I resend an event invitation?
Follow the steps below:
1. On the left menu, click 'Events'.
2. Click on the desired event title.
3. You will be taken to '5. Attendance'.
4. Click on student.
5. Student details box will appear. Click 'Resend Invite'. An invite will be sent to parents and student.
How do I move an event date?
To change the date of an event, follow the steps below:
- Select the 'Events' tab from the left-hand menu:
- Find the event you wish to change, and select the 'Proposal' Tab:Alternatively, if the invitations have already been sent, select the grey arrow to cause the above boxes to display:
- Scroll to the bottom of the proposal page, and select 'Move Excursion Date'
- Enter the new date, and click 'Confirm'
NOTE: If the invitations have already been sent, the responses for these invites will NOT be changed. To inform parents/guardians of the new date, we recommend sending them a message within the event. For a guide on how to do this, please click here.
How do I change the RSVP date for my event?
Follow the steps below to change the date for an event RSVP:
- Select the 'Events' tab in the left-hand menu:
- Click on the event from the list. This will open the 5. Attendance tab
- From here, select 1. Excursion
- Scroll down to the RSVP date section, and change it to a future date (even one day in the future will allow parents/guardians to respond to invites).
- Then scroll down to the bottom, and click 'Save' at the bottom right
Once completed, the parents/guardians will be able to respond to invites as per usual. If they are still having issues, you are able to send them a new invite link.
Was this article helpful?
That’s Great!
Thank you for your feedback
Sorry! We couldn't be helpful
Thank you for your feedback
Feedback sent
We appreciate your effort and will try to fix the article